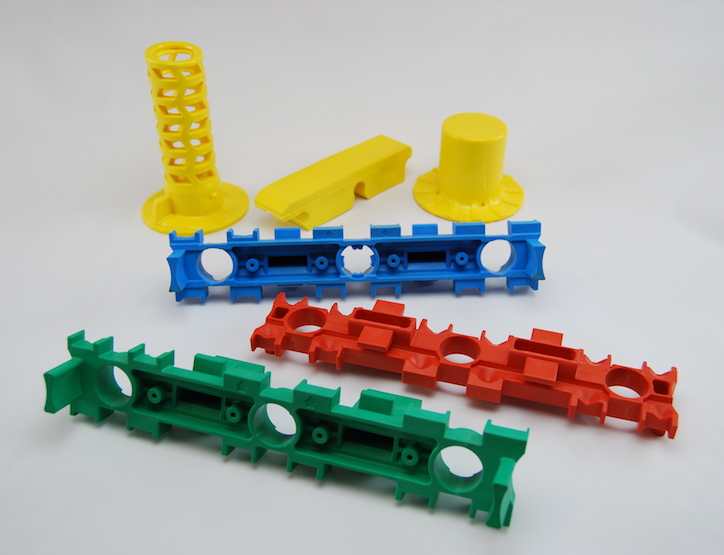
What’s the Best Way to Make a Plastic Prototype?
Tooling for plastic injection molding presents a formidable barrier to any team needing a plastic prototype or a few parts for prototype testing and evaluation.
For one, the price tag can run into six figures. But lead time is often an even bigger issue. A moderately complex mold tool might take six months to machine, finish and prove out — time that could be spent on testing and design refinement. No wonder rapid prototyping (RP) attracts such interest!
Additive manufacturing technologies — and there are at least three of relevance to those designing and making plastic prototypes — offer great potential for lead-time compression. Inevitably though, using RP for prototyping demands some compromises.
Fortunately, there are innovative plastic prototyping technologies available. Read on to learn more about their advantages and limitations so that you can select the best way to make a plastic prototype that will meet your project requirements.
The Hard Tooling Conundrum
Injection molding forces a shot of molten plastic into a cavity. High pressure is often needed to prevent non-fills, but this tends to open the die. The solution is a molding machine that applies more closing force, which demands very strong mold tooling. Closing up the die, along with temperature cycling and the abrasive effect of the flowing plastic all take a toll on the die material, which is why a hard tool steel is the usual choice.
Machining the complex geometries needed to form the finished part is a painstakingly slow process, especially since any mistake could mean starting over. Often the steel is too hard or the shapes too challenging for conventional milling, forcing the die maker to resort to grinding and electrical discharge machining (EDM). The end result is a tool capable of millions of cycles, but that makes for very expensive prototype quantities.
Additive Manufacturing Options
The appeal of using additive manufacturing to create a few prototype parts is clear. Going straight from CAD model to solid piece eliminates tooling costs and trims lead times to days. That said, RP technologies aren’t all the same and the end result is not necessarily going to meet all the needs of a prototype.
Stereolithography Apparatus (SLA)
In SLA, a UV laser solidifies a liquid photopolymer (a specialized epoxy resin). The laser sweeps over the surface of the polymer, creating a solid layer some 0.005” thick. The table then lowers, allowing more liquid to cover the solid layer, and the laser scans again.
On completion, an SLA part needs washing and then sanding to remove ridges between layers. Accuracy is usually better than 0.005”.
Fused Deposition Modeling (FDM)
Plastic filament is extruded through a nozzle onto a platform or support plate. The plastic is heated to make it soft and sticky and shapes are built up by placing successive layers on top of one another. Some finishing is usually needed to create an acceptable final appearance.
A range of plastics are available for FDM, including polycarbonates, polyamides and polystyrene. Accuracies are typically in the region of +/- 0.015”, although some machines can achieve better.
Selective Laser Sintering (SLS)
In sintering, powder is heated until the granules join together. The SLS process looks similar to SLA in that a 3D shape is created layer by layer with a laser rastering over the powder to provide the heat.
SLS works with both plastics and metals. Layers are typically 0.004” thick and finished part accuracy is usually better than +/- 0.010”. SLS can produce fully-functional parts when care is taken to avoid porosity.
Rapid Prototyping Considerations
Before rushing to order plastic prototype parts made via additive manufacturing, there are a few points to consider:
- Not every plastic is suitable for RP — it may not be possible to get the exact properties and performance needed.
- Form, fit, and finish are usually inferior to that achievable via injection molding.
- Less-expensive RP machines have a relatively small working envelope.
- The time to produce one piece can run into hours, depending on size, complexity and layer thickness — producing more than single digit quantities can be slow and expensive.
A Third Way to Make a Plastic Prototype: Rapid Injection Molding
Given the limitations of RP, it’s prudent to evaluate all possible plastic injection molding processes with regard to the properties needed in the prototype. One that’s often overlooked is rapid injection molding (RIM).
RIM addresses the challenges inherent to plastic molding by procuring tooling made using aluminum rather than steel. Easily machined, aluminum billet is quickly milled to shape on a CNC machining center programmed directly from the CAD model. By avoiding slow and expensive processes like grinding and EDM, the mold tool can be put into the molding machine in just days rather than months.
A RIM tool lacks the lasting durability of one made from hard steel, but given the savings in cost and lead time, that may be an acceptable trade-off. The advantage in terms of prototype production is that the parts molded are the actual production-intent items and will have the same fit, finish, and performance.
So if you need a plastic prototype, don’t necessarily rush to 3D printing. While it attracts those needing a plastic prototype in a hurry and avoids the steep cost of injection molding tooling, often overlooked are the compromises necessary in terms of fit, finish, appearance, and performance. If you need a functional prototype, chances are 3D printing won’t do the job; rapid injection molding will be a better option.
The key is to consider what the prototypes are for and then select the most appropriate prototyping method. When contemplating a plastic prototype, make sure to explore all the options!
If you need help selecting an appropriate process for your next plastic prototype, please contact us.
